
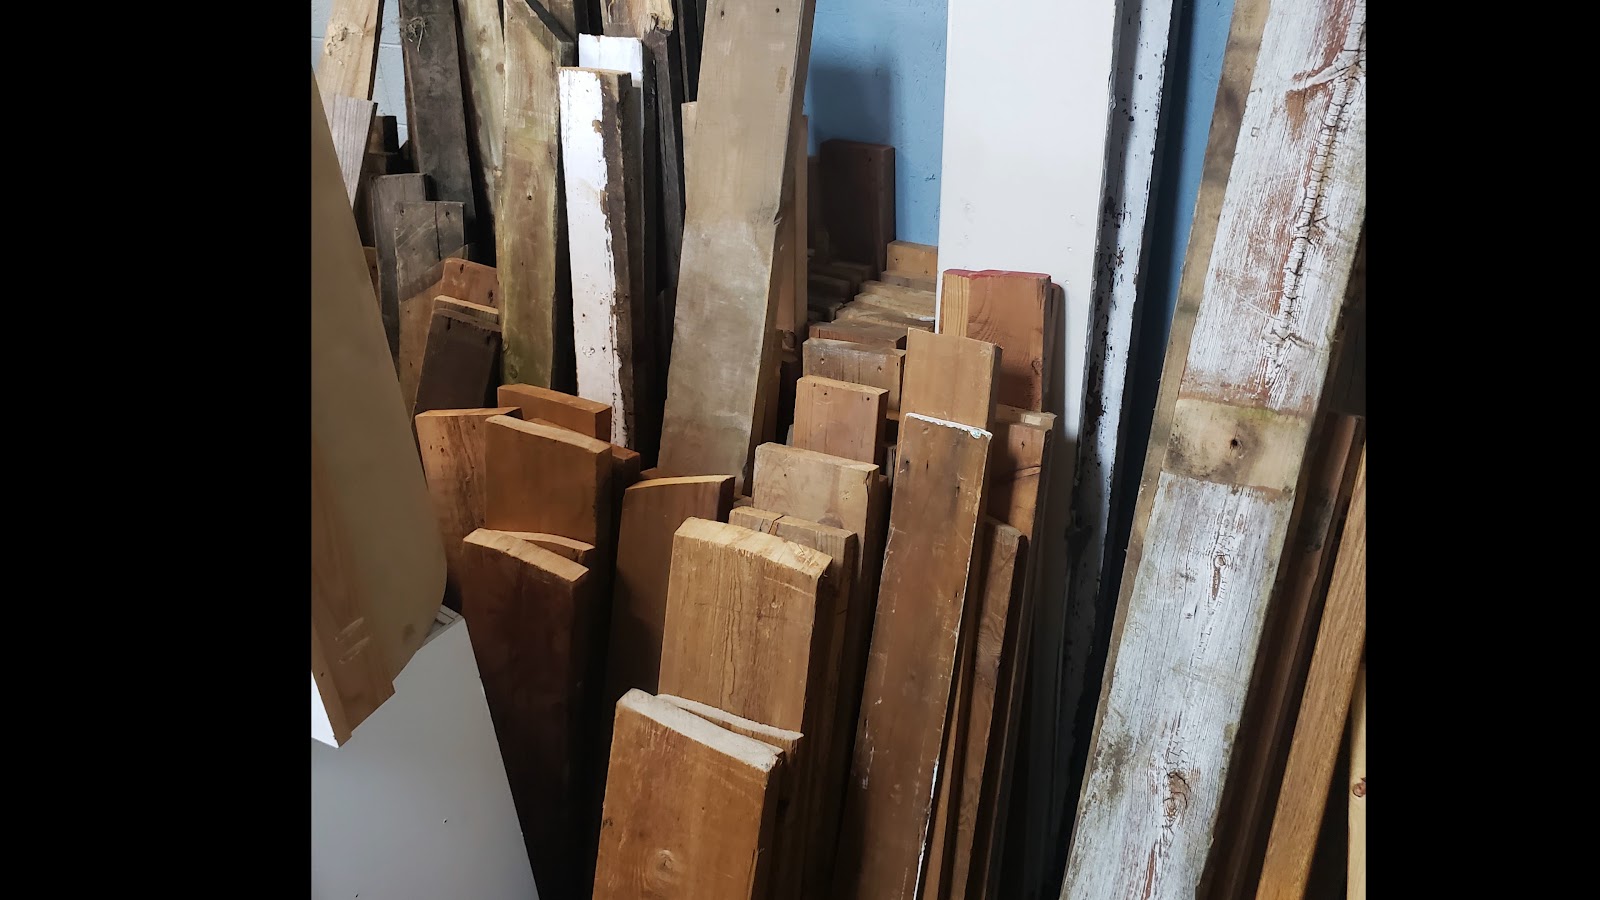
Like many guitar players, years ago I found myself thinking about making a telecaster from the humblest of woods: Pine. Enter the Pinecaster, or Barncaster. I decided to do what so many have been doing for the past 10 years(maybe 20?) and use a long stabilized piece of old, reclaimed wood. In my case, I started looking for wood that was used for architectural purposes 50 or more years ago. I happened to find some boards at a lumber recycling shop. They were from a building that was built in the 1920s. This is old pine, though not from a Barn. So, maybe the Barncaster moniker doesn't apply- perhaps "OldHardwareStoreCaster?"
We sorted through boards for about an hour, finding ones that weren't too beat up, warped or cracked. Also, we tap tested them, listening for boards that might have dull response due to cracks or other issues.
This board has a great resonance. I used parts purchased from Warmoth, and an NOS Warmoth neck from an online seller.

I don't have much of the big machinery used by most boutique guitar builders. No band saw, jointer, planer, drill press or a spindle sander, so I got creative or did the job by hand.
I trim the ends off and then cut this board in half. Then I'll joint them edge to edge with a simple butt joint after getting cleaning them up. If you're good with a hand plane, this method will make an excellent joint.
These are my trimmed boards, which need to be flattened. Since I want to keep some of the rough sawn look of the front, I'm just using a very sharp hand plane to reduce the cupping of the board.


To get the best grain match, I cut off the inside edges of the boards. The masking tape super glue trick is very effective at keeping the boards in place where clamping might be difficult. I use this method with my straight edges to get very straight cuts with a circular saw. You could also make a jig with toggle clamps.
Now my boards are ready for jointing. I'm trying a new method here, using a circular saw as a jointer. The key is to clamp the boards tightly to a very flat surface while using straight edges to give the saw a perfectly straight path. This way the blade cuts both boards at once. For each pass, the boards are reset with glue and tape, as is my straight-edge track. Each reset puts the blade exactly in the middle of the boards, where they are touching. The joint is perfect in 3 passes.

I always do a dry run before glue up, to position all necessary tools. On my next build, i'll use a few grains of sand on each end of the board to keep them from creeping.
There was a little bit of tar on this board, so I carefully scraped it away with the back of a scalpel.
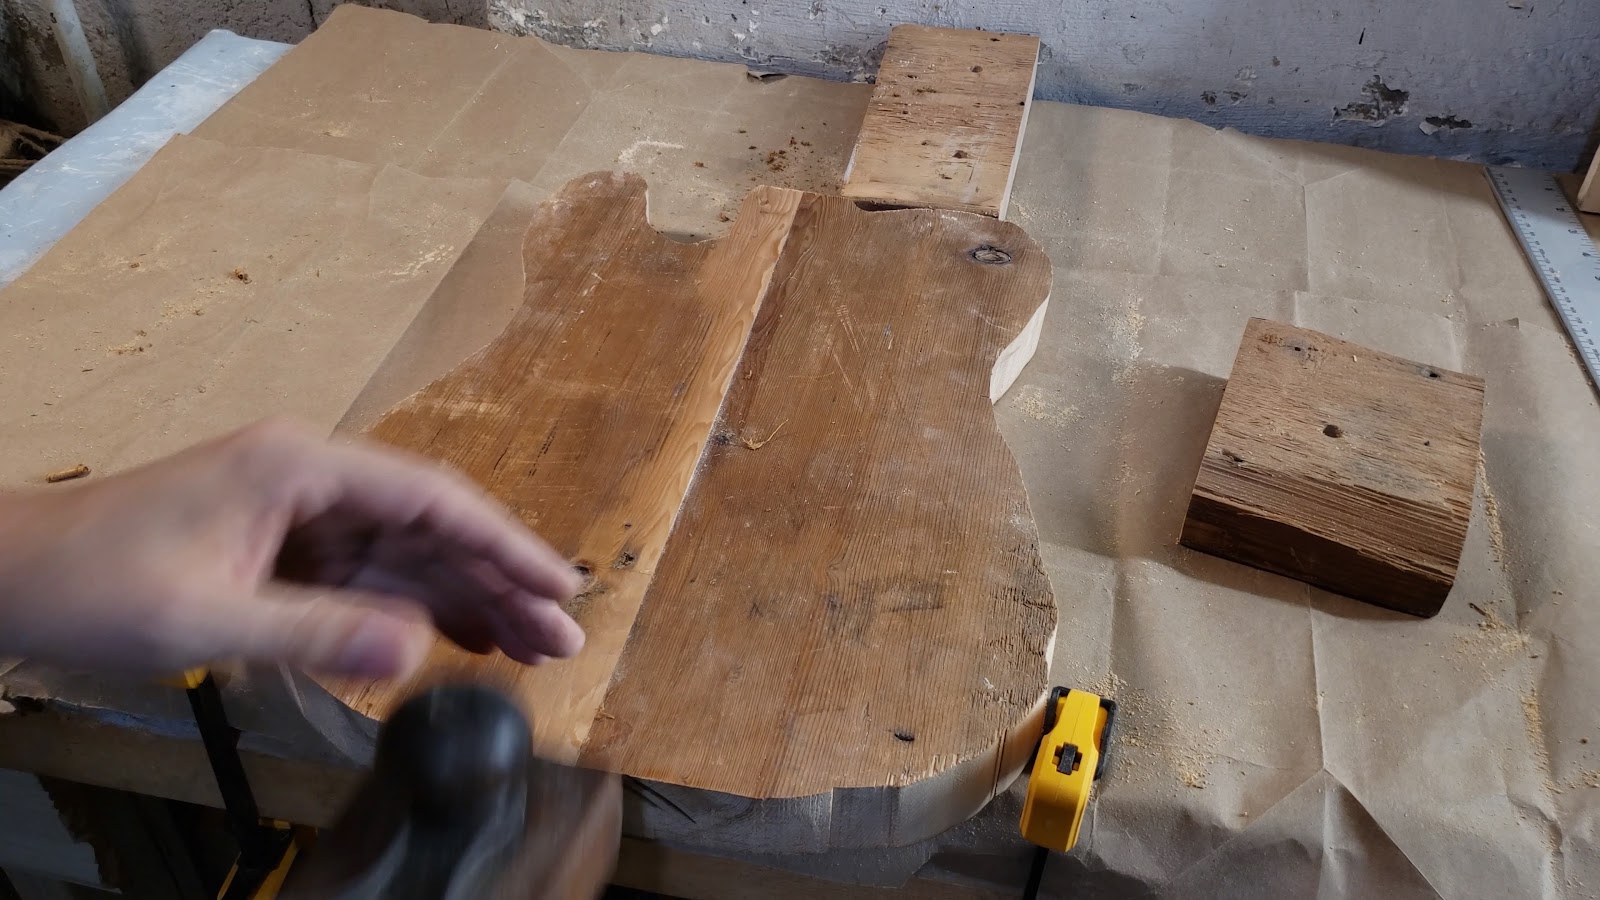
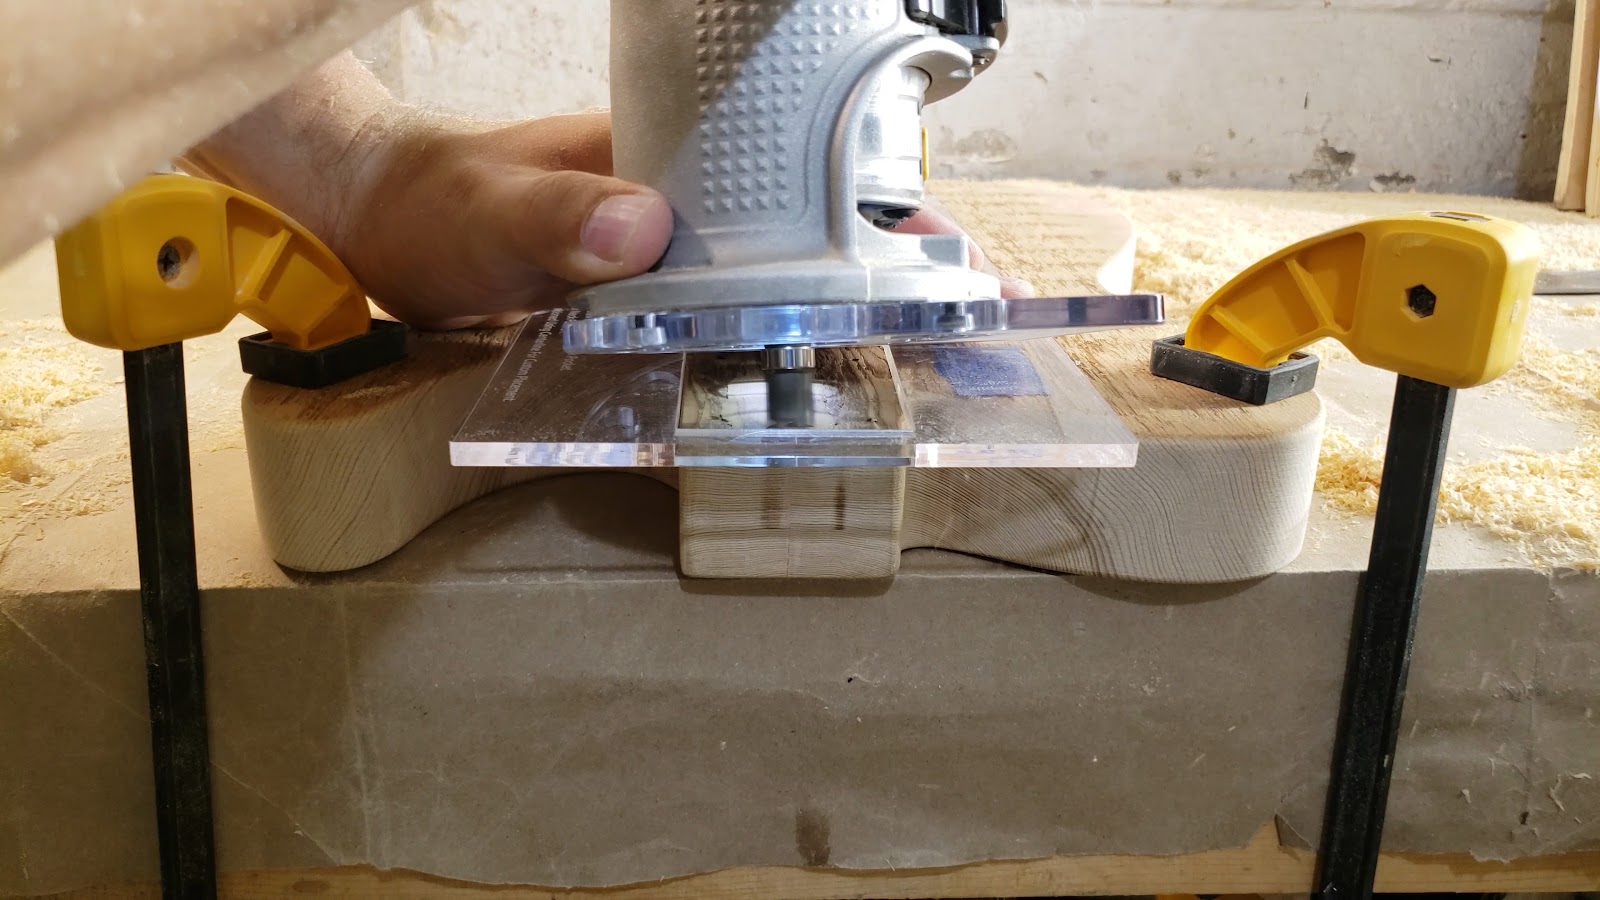
I decided to buy a nice Template to take some of the guesswork out of this build. The clear acrylic and center line made it easy to match up to my center joint for tracing.

A few days of drying and I'm ready to cut out my body shape.
So here I am at the scroll saw. I'm using a high quality, 10 tpi skiptooth blade, which works pretty well. For very hard wood, you might need a jigsaw or bandsaw.

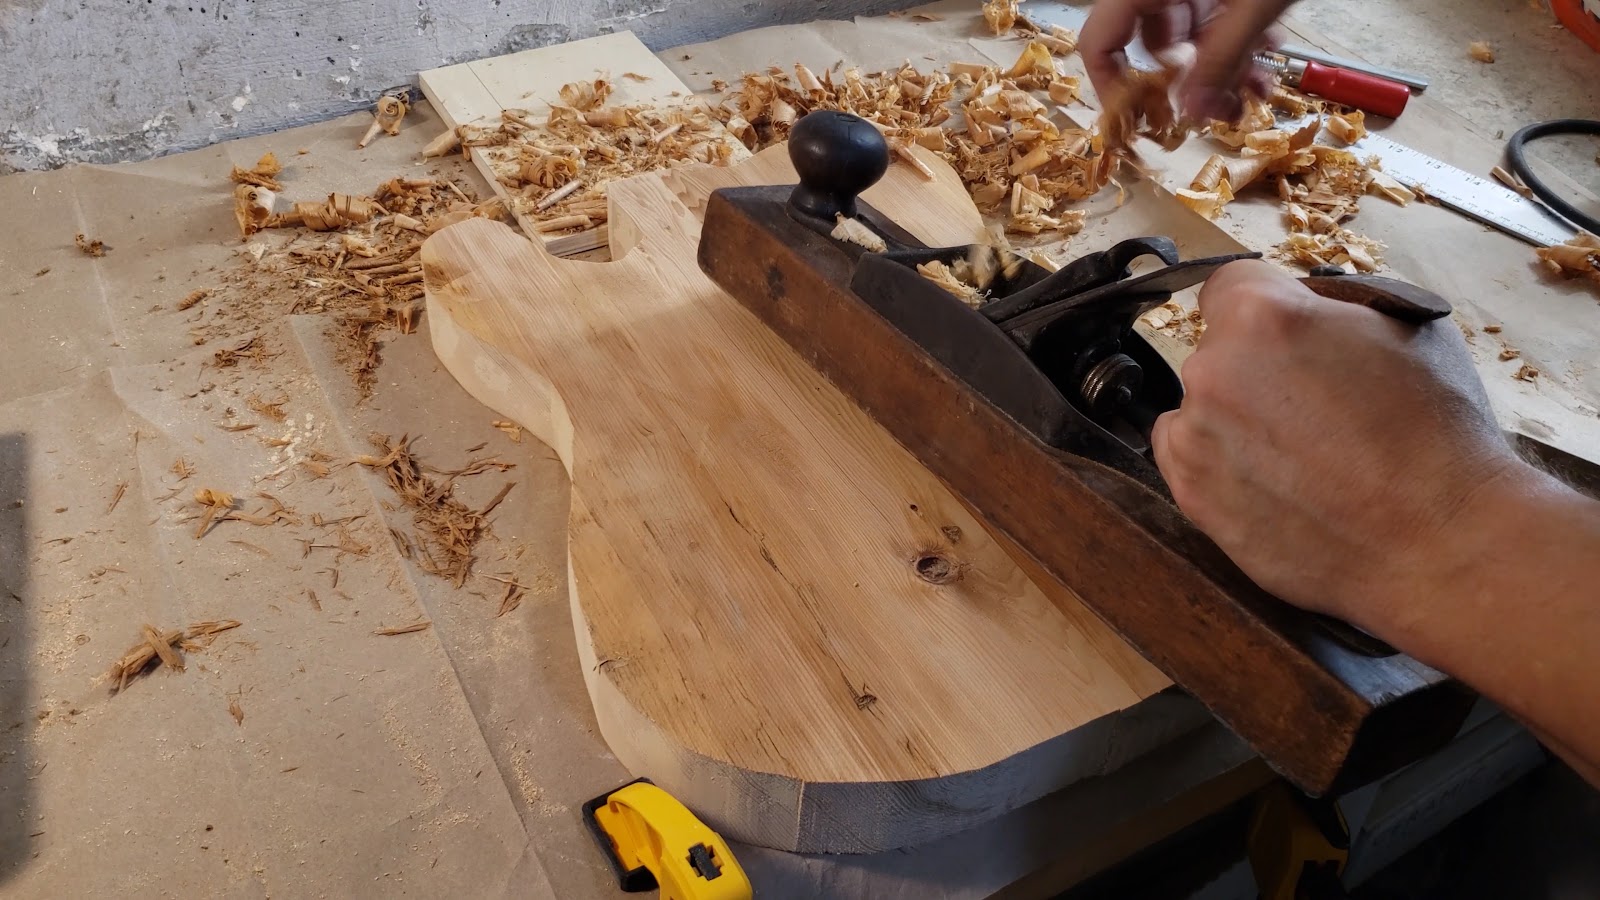
And I'm ready to flatten the back. You can see I had a little bit of creep during glue up, about a 32nd of an inch. It's no problem with a sharp hand plane, though. I used 320 grit to just get the back looking nice and clean.
Now I'll adhere my template and use my trim router to get the final body shape. I got really lucky with tearout as you'll see in a few places in the video. The parts that did tear out, did not rip out too deeply. For future builds, I'd make a bigger acrylic router base, to keep it perfectly flat on every surface. Overall the process worked fine, and was very careful not to nick my master template.

One more round of flattening with the hand plane to make sure everything is nice and level. I'm not trying to remove too much of the texture, I just want a flat surface to mount components.
And then some very light passes with some 320 grit to remove any 100 year old splinters from the playing surface... There were a LOT of splinters!
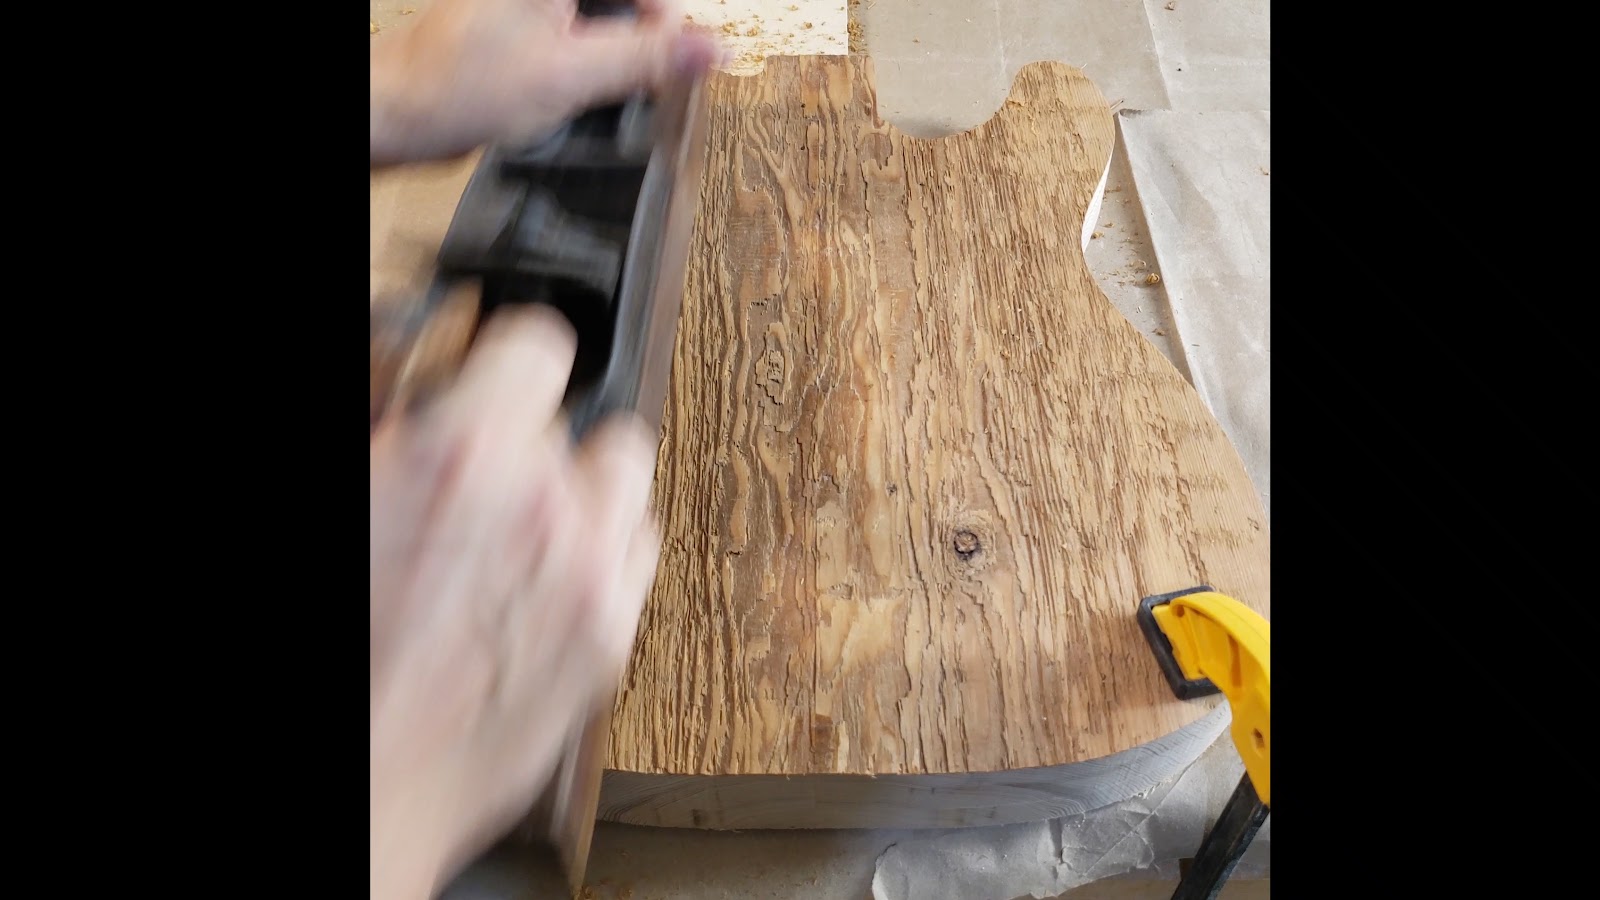
Since I don't have a spindle sander, I block sanded all the edges with 80 grit to get perfectly flat sides.

Now that the sides are flat, I need to put a radius on the edges. Instead of using a router bit, I decided to use various sanding blocks to make a radius of approximately one-eight of an inch. To give a soft radius, I finish the job with with no block, using just the shape of my hands behind the paper. Since its such a simple radius, I found it to be less risky than using a power tool for the job.
I ordered a lot of extra screws, many of which I didn't use. One note to my future self, most new hardware comes with its own screws.
I used super glue to secure the knots. If you don't glue them in, there's a good chance they'll start rattling and fall out.
I don't have a drill press. But I do have a desktop CNC mill, which I used to manually drill all of the holes that need to be perfectly square in the body. I've done this with a hand drill, and it works fine if you're VERY careful and go slowly. There are other ways of getting straight holes, like using a square drilling block but this method worked just fine for me.

If you're drilling by hand, I strongly suggest marking all of the holes and removing the template. Or, make a copy of your template and save your expensive original for future copies.
Without this cnc method(or maybe a drill press), I would not have been able to make these ferrule holes so cleanly. If I didn't have this CNC option, I'd either opt for a top loading bridge until you can get access to a drill press or a drilling jig for the ferrule holes.
Here I'm doing the body routing in several passes. After the first pass, you can remove the template and use the cavity to finish each rout. For most of the cavities, I pre drilled about 1/2" down to ease the work on the router bit.


I very gently plunge routed my way into the neck pocket on the first pass. In the future, I'll use the 3 board method again, since I found that to be a littl
e more stable overall. The more stable you are in this stage, the less sanding you'll need to finish the pocket.
So, I have a little smoothing to do on the neck pocket. I used a very flat board with 80 grit paper for the first passes. The other side has 320 grit for finishing. The process is much clearer in the video.


For the neck screws, I drilled successively larger holes by hand. Since the guide holes are already square, it's easy to keep the alignment correct.
This is the only moment during the entire build I really wished I had a drill press. Drilling this hole perfectly by hand is tough. The rest of the holes will need a long drill bit, or extensions as I'm using here.

One of my "Dream Tele" inspirations is the cutoff Bridge on the GE Smith designed telecaster. It takes a bit of extra care to install it properly, but I love the result. Before:
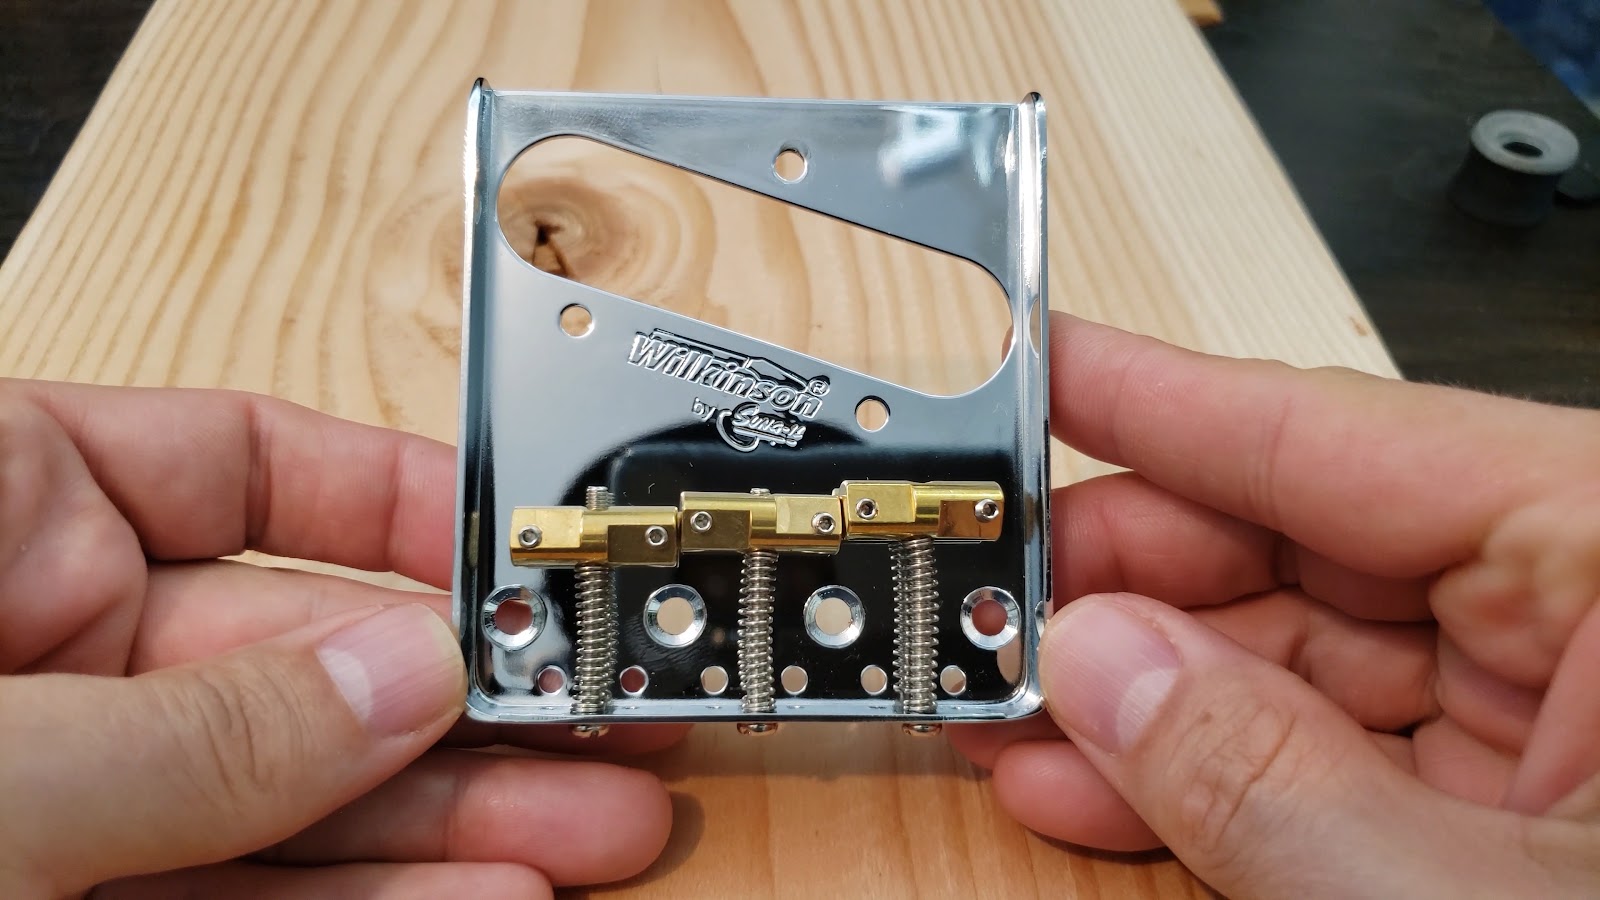
It starts with a hack saw... And ends with rounding over the corners very smoothly.
I made a tapered sanding bit to remove the finish from the inside of the tuner holes. It may not have been necessary, but the grommets felt very tight and I didn't want to risk cracking the peg head.
Once again, I manually drilled these holes. I think a combination of a dull bit and high drill speed burned the holes a little.
I decide on a shellac finish for the body. I found this finish to be very easy to prepare and use. I used 99 percent Isopropyl alcohol instead of denatured alcohol to make about 6 ounces of finish. It worked perfectly and I see no reason to ever use denatured alcohol.


I kept the first coat in the video in real time just to show how easy the process is. The only thing I removed was about 7 minutes of drying time between coats.
Keep an eye on drips and runs as you work. You only get about 4 minutes to touch them up before you get drag marks in the finish.
If you like a satin finish, you can gently buff the body by hand with a blue scotch brite pad after curing for 24 hours. The process takes about 10 minutes.
I wanted to get the neck, pickguard and control plate perfectly aligned, so I drilled the control plate first. In future, I'll drill the control plate last.

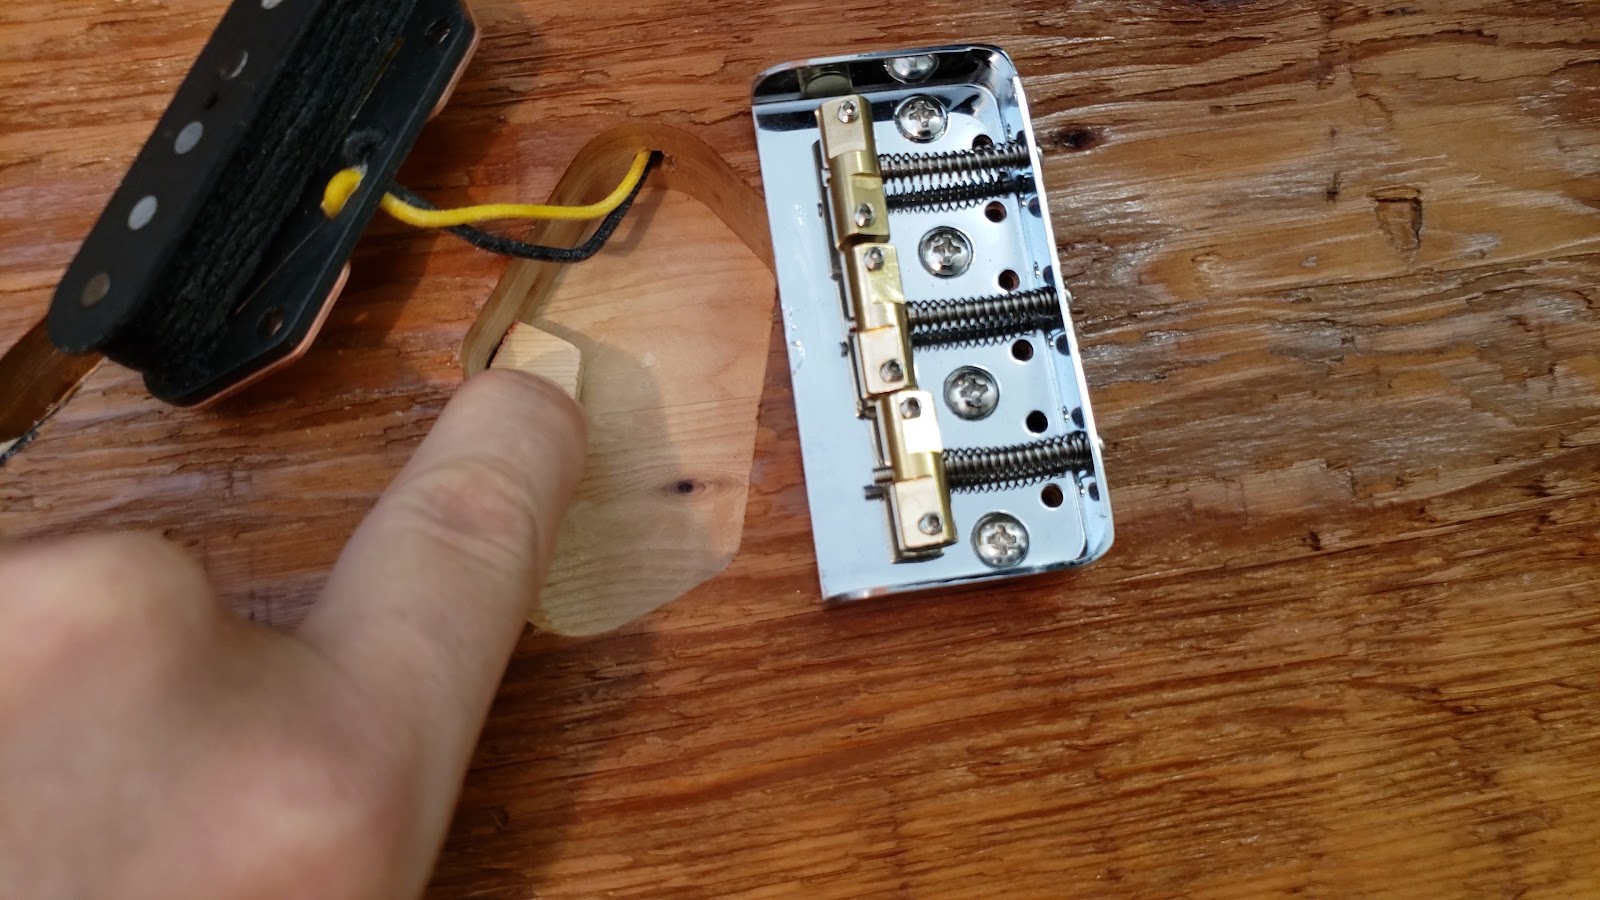
I adding back some of the original wood since my pickup will be mounted directly to the body with wood screws . Be careful you drill through the body, and if you look closely in the video, you can see I shortened these screws to 1 inch.


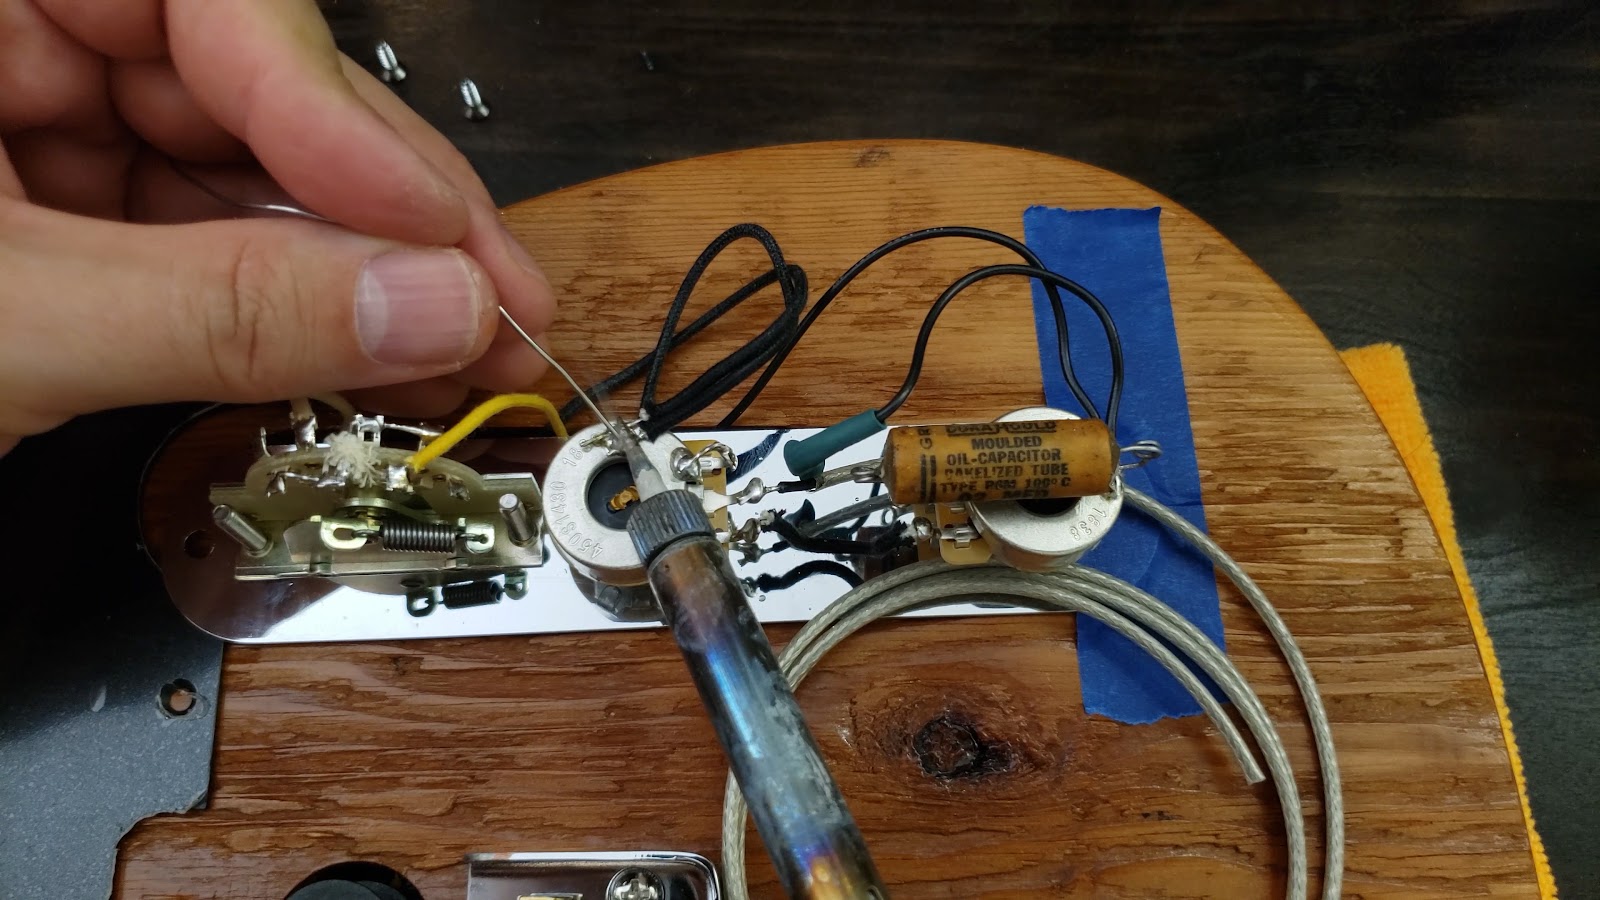
The Cap is an old paper in oil cap from some long disassembled amp from the 50's. Probably an old tape machine I had. It works just fine for this purpose. Also, I ended up removing this shielded wire and simply wired in a twisted pair of red and white wires. The shielded wire was simply too stiff.
One more little detail I overlooked...I forgot to drill a hole for the bridge ground wire. I just slipped it under the face of the bridge and it works great. In the future I'll likely drill a hole for it under the bridge.
I use some string to check the spacing of the strings on the fingerboard. Once I have the neck where I like it, I tighten the screws one last time.

The magic of editing makes the screw holes look too big. They are not. They held up fine.
One little woodworking tip that I use for any occasion that requires an accurately drilled hole is to run the drill in reverse before actually drilling. This helps the bit center itself before moving forward.
This is a 10 year old New old stock neck, so it needed a bit of care before stringing it up.

Don't forget to install the string tree! I used a 1/4" socket to limit the depth of the drill so I wouldn't go through the peg head.

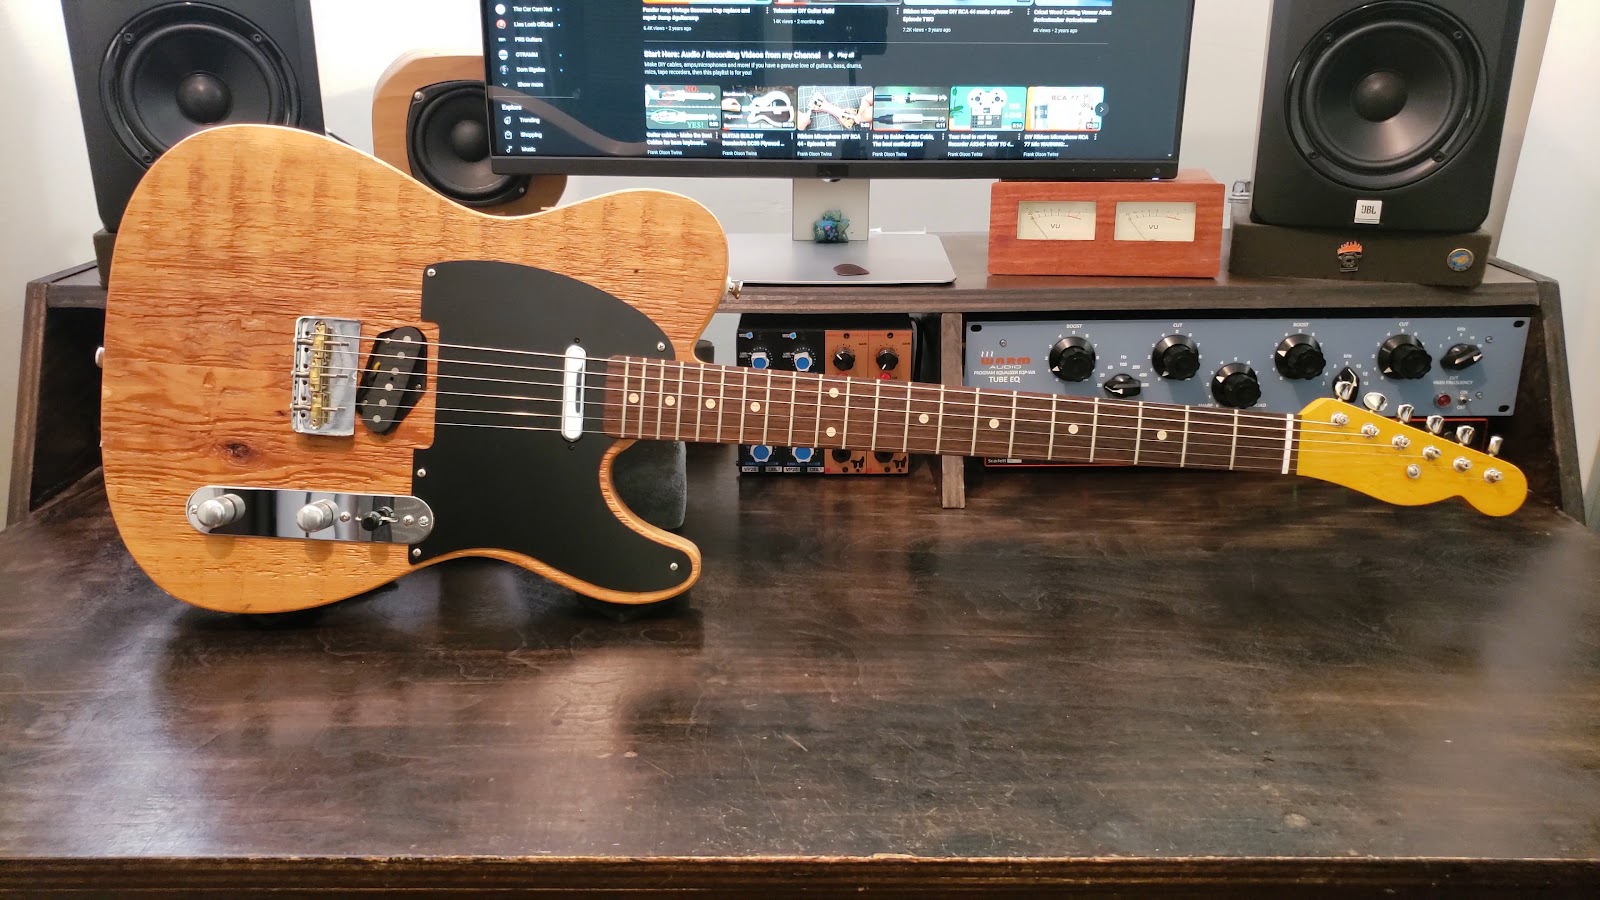
And there we have it, my dream Telecaster, ready to rock! Now it just needs a custom headstock logo....
No comments:
Post a Comment